First progress stage: My first plan of attack for the fruit bowl project was to get my textures of all the fruits and set-up the scene. When I first began texturing I wasn’t observing the actual elements and composition of the fruit and textures. So the very first thing I did was break down the elements and aspects of the fruit bowl. I didn’t want to add any indirect lighting in the beginning, as I wanted to go through a step-by-setp process set-up. These were some of the images from my very fist renders.


Strengths: I was starting to get my textures looking realistic and accurate. I found that after I broke down the different elements I was able to easily understand and problem solve texturing pipelines. I found that the composition was coming together and the placement was quite good.
Weaknesses : There was still quite a bit of work to do in terms of getting the textures looking accurate and real. The lighitng needed quite a bit of work and the textures in general were looking quite flat. The bottle needed a lot more work in terms of being very flat and unrealistic. It wasn’t looking like the way it should and I started playing around with the caustics but I wasn’t quite hitting the mark.
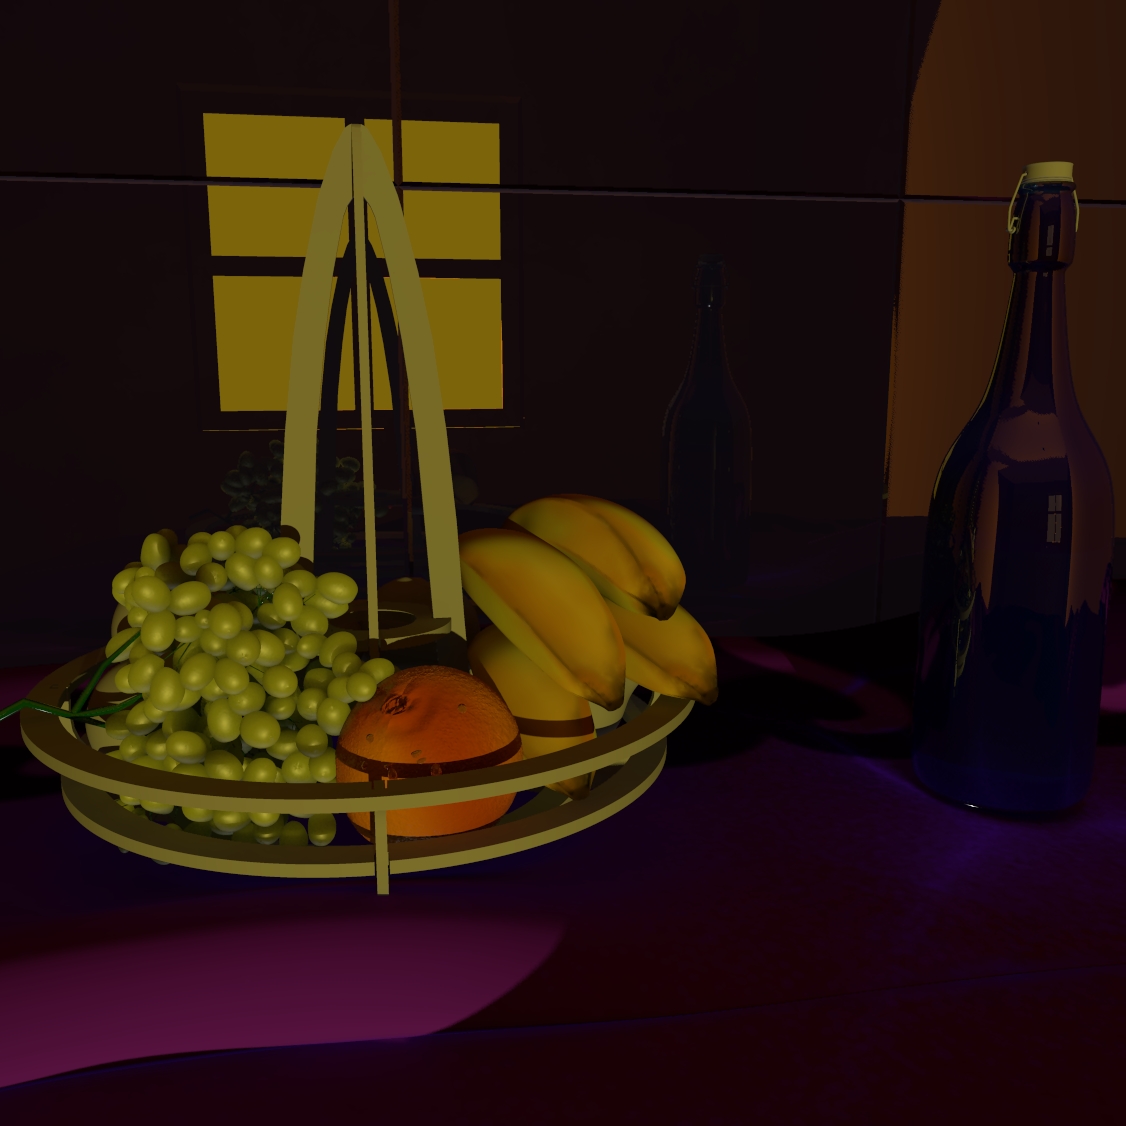
Second progress stage: During this stage, I was mainly focused on nailing the textures and the lighting as well. I went back and added more detail or sometimes reduced detail of the textures on mudbox. I realised that my textures weren’t quite working as well as I wanted them to, in terms of being accurate. I referred to my photos a lot more and the renders were coming together. I still had to work on my composition.

Strengths: My textures at this stage were looking quite realistic and accurate. I think my basic lighting set-up was on the right path but I thought I could achieve more. I liked my colour scheme and the colour of my lights.
Weaknesses: There was still quite a bit of work to to be done and more in terms of my lighting set-up and refelctions. The light was looking quite flat and this was before I had physical sun and sky turned on. I was using an area light as the sun and a spot light as the fill light. The bottle had definately needed more work and I was contemplating changing the colour of the bottle to a transparent material. The cloth I was using was just a reference and I decided to go into mudbox and texture the bench-top. I definately needed more indirect lighting and light bounce in the scene. I was quite worried about my caustics and I decided that I would focus on my lighting first. The bottle itself looked flat and unrealisic and it was absorbing more light than reflecting it.
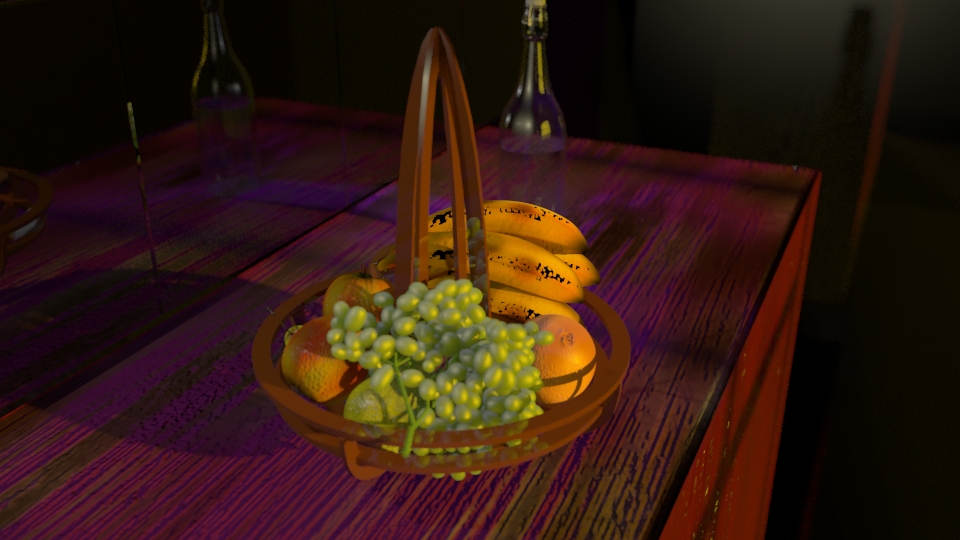
Third stage progress: At this stage I was focused very much on the lighting and composition of the scene. I started playing around with the caustic light and my physical sun and sky. I progressed the most at this stage in terms of getting everything together and composing the scene well. I changed my lighting set-up based on this image for my photorealistic lighting:
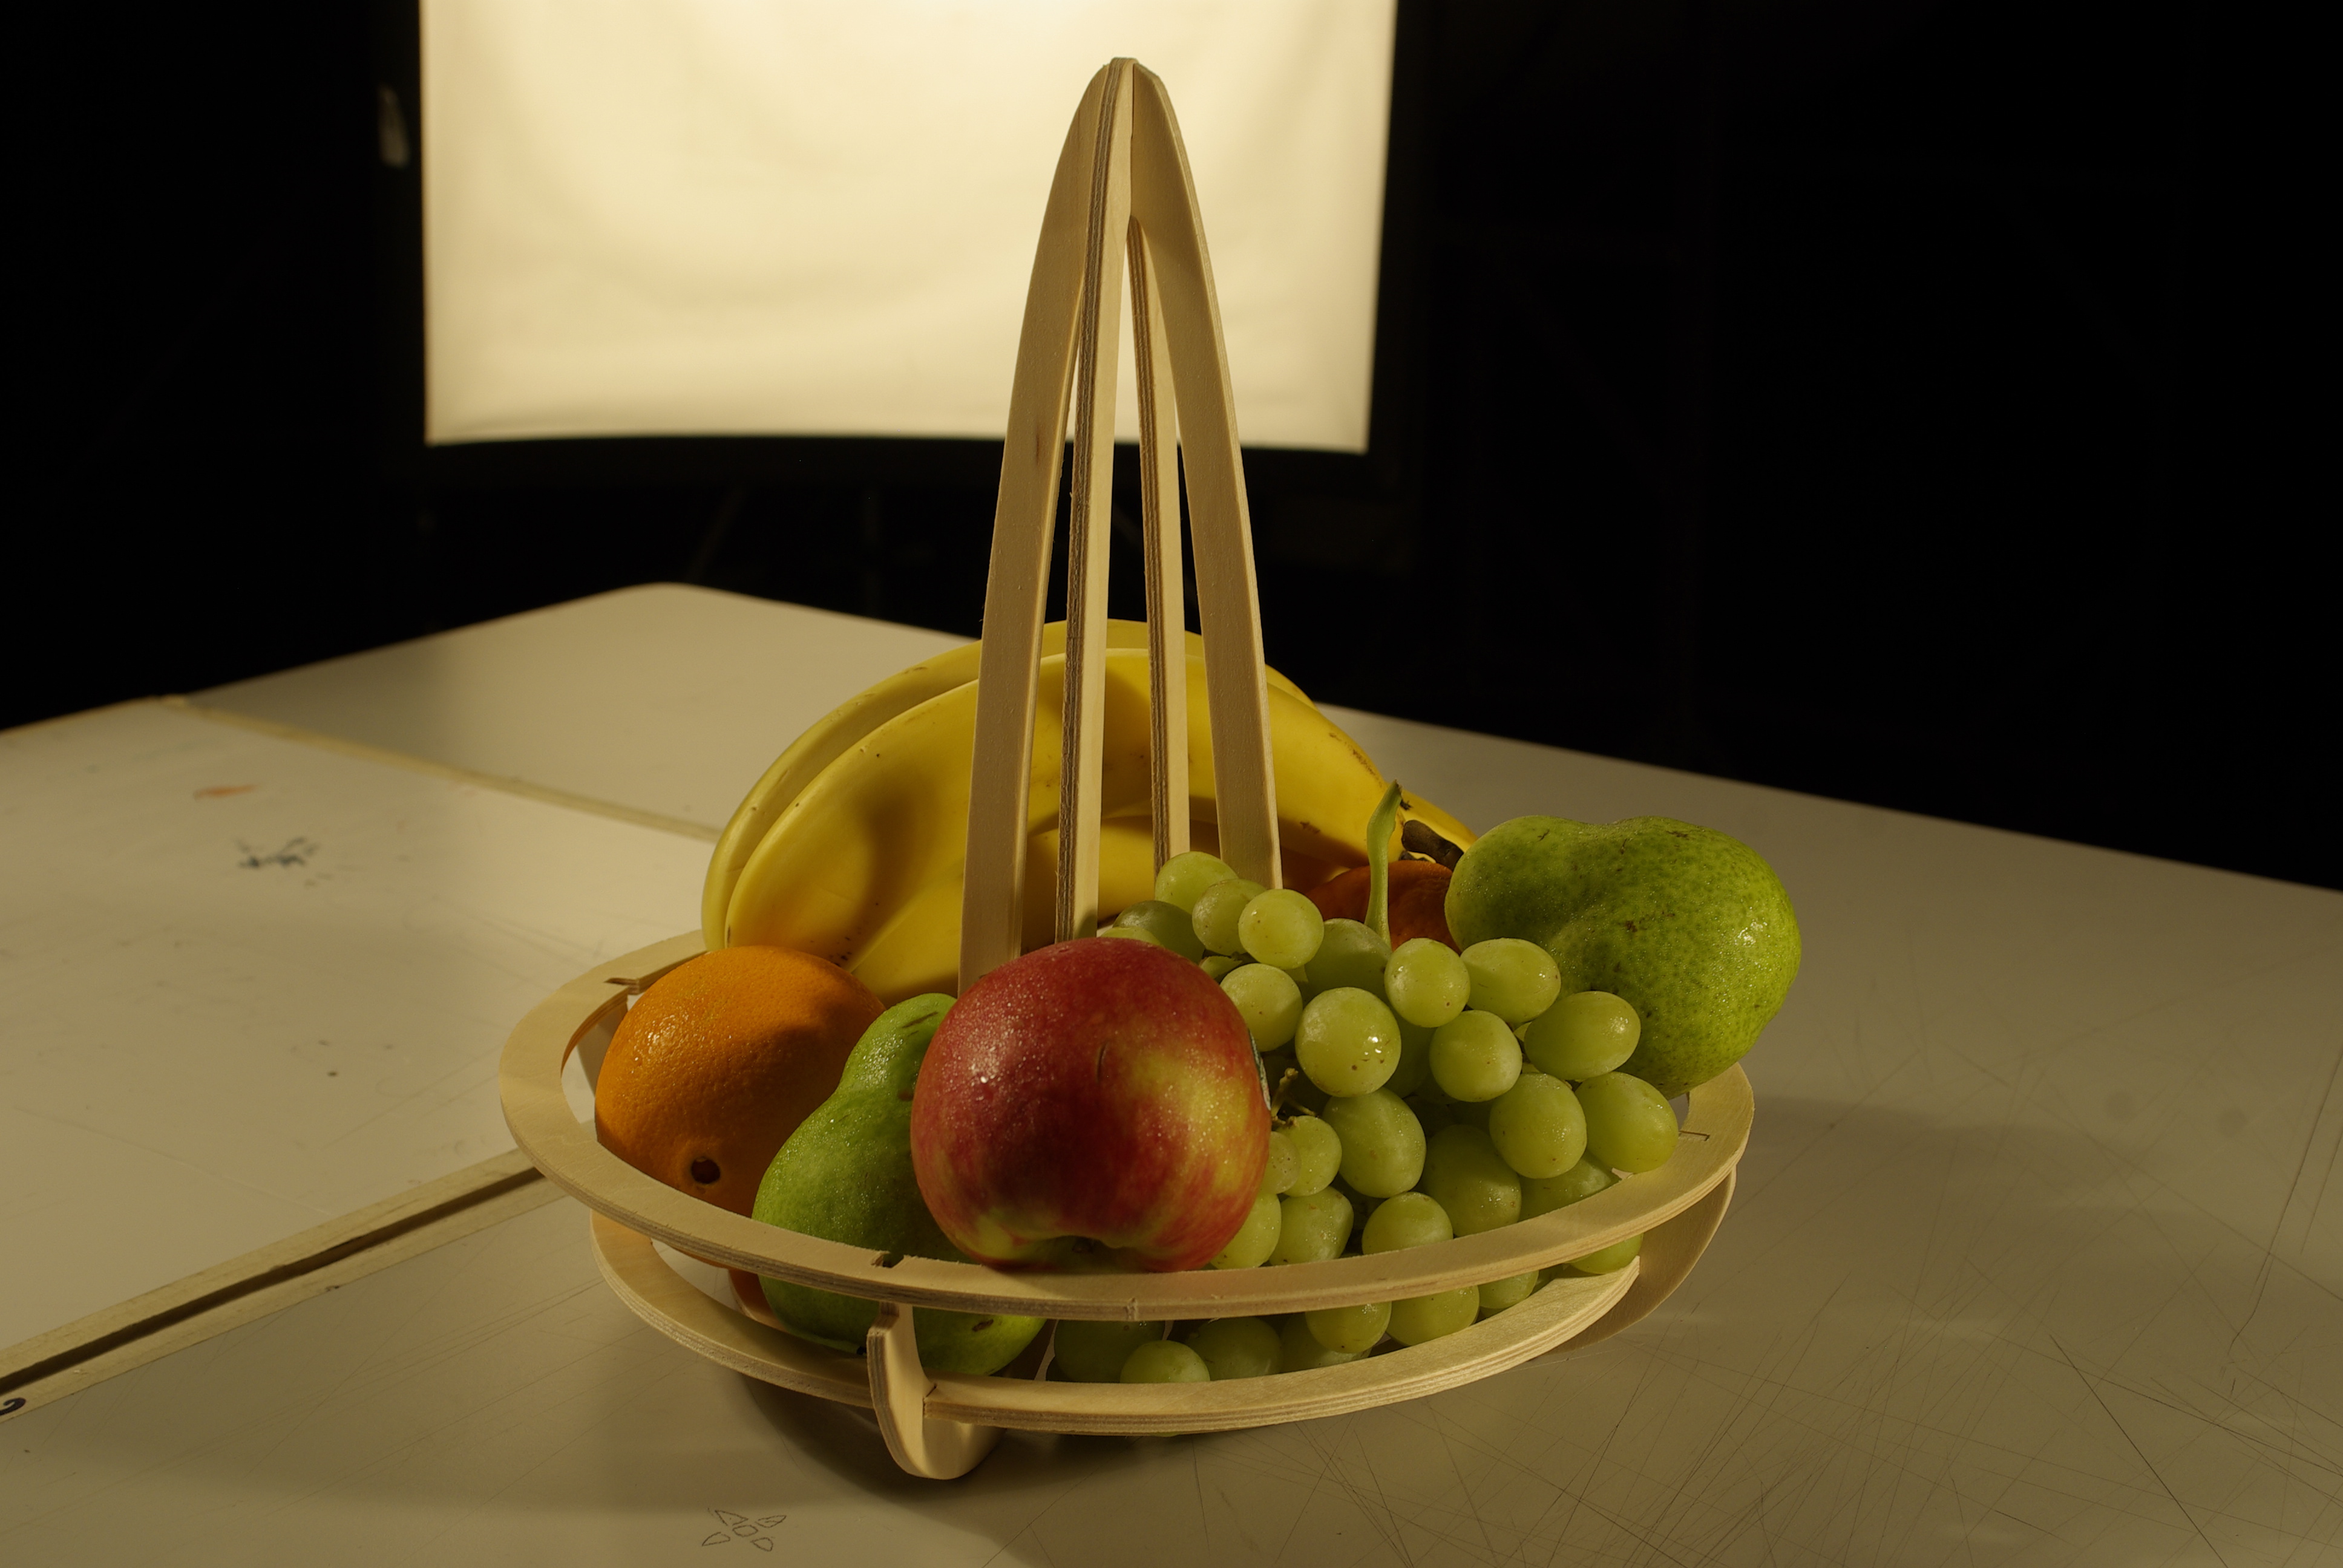
I positioned my lights in a way that suited and matched this light set-up. I had an area light at the back, which would give the soft light effect seen in the image. I had a spot light acting as a rim light and used a spot light as I wanted the light to only effect certain parts of the fruit bowl as seen in this image. My physical sun was acting as the main source of light. I also got rid of the silk cloth I was using and created a purple wood bench-top. I created the texture on mud-box and also painted it on mud-box.
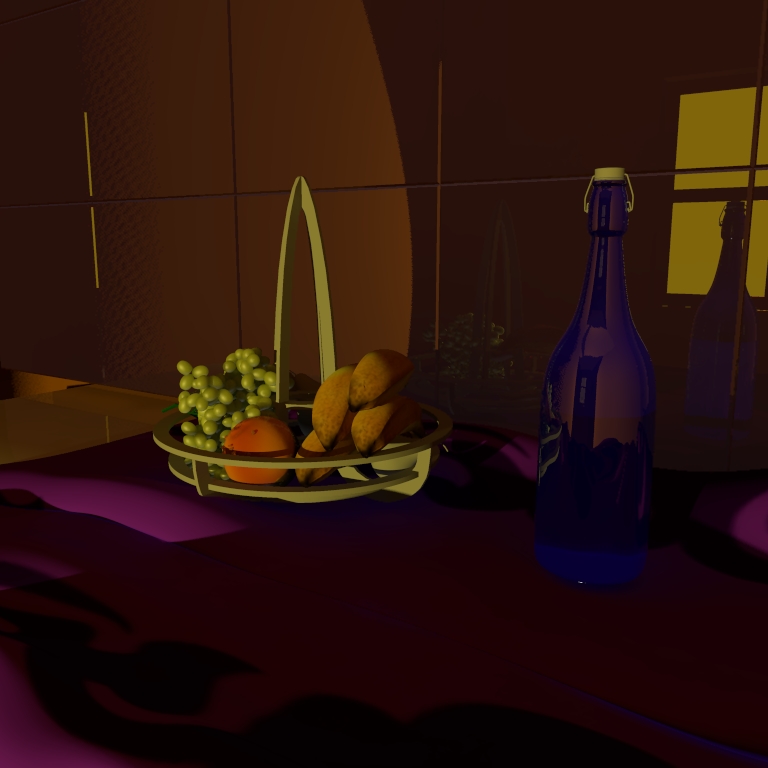
Strengths: I found that during this stage my lighting set-up had improved a great amount, as I was following an example and understanding the way light worked more. I had started altering and enhancing some aspects of my bottle too. I decided that I would change the color of it, to a transparent color rather than the blue, as there were some aspects that just weren’t working quite well. I also enhanced some of my texture, to make them more realistic and match the accuracy of the fruit textures seen in the images. My lighting was a warm tungsten light to match the lighting set-up seen above.
Weaknesses: I wanted to achieve more with my lighting and my textures. I hadn’t quite figured out what I wanted to do with my artificial lighting set-up and was struggling with getting it right. As until this point, I had both final gathering and global illumination turned on and realized that my renders were far too blown and washed out. The GI was a waste of energy as it scattered light across the room and was unnecessary. Final gathering was the option I chose as it made more sense to calculate the amount of rays through the render camera and focus only on that spot, rather than the whole room. I wanted to focus on my lighting and the reality of the textures.